Search This Blog

Thursday, January 13, 2011

"περίπου" ρυζόγαλο... / Rice pudding with Matcha tea

With my little experience i have in cooking i have learned a few things... One of these is when you try a new recipe that has a few things in common with an old favorite please, please, please do not call it with the old name. Cause that will only provoke expectations that in most cases will not be met. And people will become frustrated and will not enjoy the "new" as they would be expecting the "old"... Has happened to me many times and i need to shape up and keep that in mind all the time... So... this recipe today will not call it rizogalo as it is known here in Greece and it is a very old and traditional desert. Cause a lot of things are different in it this rizogalo recipe from what we know.. First the addition of orange zest that gives it a nice fresh taste but mostly the addition of Matcha tea that makes it unique. Both in color as well as in taste and aroma.

Got the recipe from Chef Eddy Van Damme's website... This man is an inspiration in many of my journeys in tastes and smells. Took the liberty of changing it a bit as the desert became a bit too sweet for my taste. Also as i did not have any strawberries i used caramelized quince that i had in the fridge! Turned out great so you can use any kind of caramelized fruit as long as it is not too strong in flavor or use less quantity of it to balance the tastes... The game it is up to you.. 

Ingredients:
Water                              240g
Rice for soup rinsed         80g
Sugar (A)                         40g
Milk                               330g
Vanilla extract                   1tsp
Zest of half an orange
a pinch of salt
Matcha green tea powder  3g
Whipping cream             120g
Sugar (B)                          30g
Makes enough for 4-5 glasses

Easy to make..
Put the rice in the boiling water and slowly simmer covered for 5 minutes. Drain rice and discard water.
Boil the milk with Sugar (A), zest, salt and add the rice. Simmer till most of the liquid is gone. Be careful and watch it making sure it is not burned. Let it cool to room temperature. Add Vanilla extract and the tea dilluted in a little milk.
Beat the cream and sugar (B) lightly. Fold in the rice mixture.
Serve in glasses with some caramelized quinces some streusel or cookie crumble!!!
Enjoy!

Όχι ρυζόγαλο...

Από τα πράγματα που έχω μάθει τον καιρό που ασχολούμαι με την μαγειρική είναι ότι δεν είναι καλό να δίνουμε παλιά ονόματα σε νέες συνταγές. Γιατί όσο κοντινές και αν είναι με παλιές γεύσεις δημιουργούνται προσδοκίες που στο τέλος δεν επαληθεύονται και τελικά πάντοτε χαμένος βγαίνεις... Έτσι λοιπόν αυτό το γλυκό δεν θα το πω ρυζόγαλο ασχέτως και αν έχει και ρύζι και γάλα και ζάχαρη... Δεν έχει όμως κανέλα και έχει και άλλα πράγματα που θα έκαναν ένα τυπικό ελληνικό ρυζόγαλο να το βάλει στα πόδια τρέχοντας όπως ας πούμε ξύσμα πορτοκαλιού (αν και έχω δει συνταγές για τέτοιο) και σκόνη από πράσινο τσάι Μάτσα. Το τελικό αποτέλεσμα είναι πράσινο, λαμπερό και συνοδεύεται σε ποτήρι με γλυκό κυδώνι ή άλλο γλυκό κουταλιού αρκετά ουδέτερο όμως για να μην σκεπάζεται η ελαφριά και απαλή γεύση του τσαγιού...
Τη συνταγή τη βρήκα από το σάιτ του Σεφ Έντυ... Την πείραξα λίγο γιατί ήταν λίγο γλυκιά για το γούστο μου και σας δίνω τις μισές αναλογίες που βγάζουν λιγότερες μερίδες. Αν θέλετε μπορείτε εύκολα να τις διπλασιάσετε.

Υλικά

Νερό                                         240g
Ρύζι για σούπα πλυμένο          80g
Ζαχαρη (A)                                40g
Γάλα ελαφρύ                           330g
Βανίλια εκχύλισμα                 1κ.γλ.
Ξύσμα μισού πορτοκαλιού
Μια ιδέα αλάτι
Σκόνη τσαγιού Μάτσα             3g
Κρέμα γάλακτος                    120g
Ζάχαρη (B)                               30g

Κάνει ποσότητα αρκετή για 4-5 ποτήρια
Εκτέλεση

Βάζουμε το νερό να βράσει, προσθέτουμε το ρύζι και σιγοβράζουμε 5 λεπτά. Στραγγίζουμε. 
Βάζουμε το γάλα, τη ζάχαρη (Α), το ξύσμα και το αλάτι σε ένα κατσαρολάκι και όταν βράσει προσθέτουμε το ρύζι και σιγοβράζουμε μέχρι να απορροφηθούν τα περισσότερα υγρά. Εμένα μου πήρε 20 λεπτά για να ετοιμαστεί.. Αφήστε το να κρυώσει σε θερμοκρασία δωματίου και μετά προσθέστε τη βανίλια και το τσάι αναμεμιγμένο σε λίγο γάλα. 
Κάντε την κρέμα γάλακτος ελαφριά σαντιγύ μαζί με τη ζάχαρη (Β) και ενσωματώστε τη στο μείγμα του ρυζιού... 
Τοποθετήστε σε ποτήρια μαζί με γλυκό κυδώνι, ένα μπισκότο σε τρίμματα και λίγο ψιλοκομμένο κυδώνι από πάνω... 


Wednesday, January 12, 2011

About Lemons, Oranges, Tangerines and Matcha tea.../Περί εσπεριδοειδών και τσαγιού Μάτσα


Lot's of great news and want to share them with you!
Our friend Kostas brought us from his garden in Vraona a bundle of lemons, Oranges and Tangerines and i cannot wait to start making things with them.. Last years lemon marmalade with poppy seeds was a great success and people keep asking me for more... Also want to make some lemon cream butter and some orange preserves... So it seems like a busy weekend! And ofcourse if you have any ideas and recipes let me know!

On other news i got from my good friends in Tsaina tea store some Matcha tea... It is sooooo expensive!!! I payed 20 euro for some 60 grams but when i found out that it can take up to an hour to grind 30 grams of the tea then i realizes why... This is the tea that in Japan it is used for the tea ceremony and nowadays it is used to colour and give taste to various foods. I am dying to use this tea to make a rice pudding that i saw in Chef's Eddy website.
More in a few days!!!

Πολλά νέα και θέλω να τα μοιραστώ μαζί σας!
Ο φίλος μας ο Κώστας μας έφερε πολλά λεμόνια, πορτοκάλια και μανταρίνια από τον κήπο του στη Βραώνα και το πόσο θέλω να ξεκινήσω να φτιάχνω πράγματα με αυτά δεν λέγεται! Η περσινή μαρμελάδα λεμόνι με τον παπαρουνόσπορο χάλασε κόσμο και μου ζητάνε συνέχεια! Ακόμα θέλω να φτιάξω μια βουτυράτη κρέμα λεμονιού και γλυκό πορτοκάλι... Αν έχετε καμιά ιδέα πες τε μου!

Άλλα νέα.. Χτες πέρασα από το αγαπημένο μου Tsaina (ένα μαγαζί με τεράστια ποικιλία σε τσάγια που το έχουν δύο γλυκύτατες κυρίες). Ήθελα να πάρω λίγο τσάι για το πρωινό και σκέφτηκα να ρωτήσω αν έχουν τσάι Μάτσα. Είχαν φυσικά αλλά ήταν πανάκριβο το άτιμο! 20 ευρώ τα 60 γραμμάρια! Όταν έμαθα όμως ότι για να τρίψουν και να κάνουν σκόνη 30 γραμμάρια τσαγιού μπορεί να περάσει και μια ώρα κατάλαβα γιατί είναι τόσο ακριβό... Το χρησιμοποιούν για την τελετή του τσαγιού στην Ιαπωνία και χρησιμοποιείται πια πολύ στη ζαχαροπλαστική και δίνει άρωμα και γεύση σε γλυκίσματα. Είναι μια συνταγή του Σέφ Έντυ που θέλω να δοκιμάσω! Περισσότερα σε λίγες μέρες!

Friday, January 7, 2011

Pralines.. / Πραλίνες


 People that cook also invent... This is the way new recipes come out to the world. The whole thing about the molecular gastronomy is a lot to do about inventing and using new knowledge into the kitchen. 

New York times is a newspaper with a great food section and new recipes and techniques that first come out there. One of the people that writes there is HAROLD McGEE.. I got a recipe he had for pralines and tried it out... Came out great! But the increadible thing about it is that it is sooo quick to make. And also another reason why it is so great is that it uses something that most of us have at home to heat up some water or milk and defrost some meat. Talking about the microwave..

So.. here how it is.
Ingredients:

3 cups nuts (I used almonds and walnuts)

1 1/2 cups white sugar

1 1/2 cups light brown sugar

3/4 cup heavy cream

1/3 cup milk

1/3 cup salted butter (if you do not have any then use normal butter and add about 3/4 of a teaspoon of salt..

1 teaspoon vanilla extract


OK.. so what you do is take a glass container that can hold 4 litters of liquid. You add everything there apart from the nuts and the vanilla extract. Put the nuts in a pan and put them in the oven at 180C for 10-15 minutes..
The bowl with the sugars etc you put in the microwave and zap it in the max power for 5 minutes. Remove it from the microwave using mitts or towels as it will become VERY VERY hot. Stir it with a wooden spatula. Put it in the oven for another 5 minutes. Remove it in the same manner and add the nuts.. Zap it for another 5 minutes and after that check the temperature with a thermometer. It should be 115C. If it is not (as it was in my case) zap it for some more time till the temp reaches that. (took me 2 tries of 3 minutes). Then you remove it from the oven and let it sit for 30 minutes. Add the vanilla extract and stir quickly till it gets all cloudy...


Using 2 spoons put pieces of it on partchment paper and let it rest for another 30 minutes. After that time it is ready to eat...


Στα Ελληνικά!


Οι πραλίνες αυτές είναι πολύ εύκολες στην παρασκευή τους και δεν χρειάζονται πολλά σκεύη. Απαραίτητο είναι ένα γυάλινο μπολ που να χωράει 3-4 λίτρα υγρό. Πρέπει να είναι γυάλινο για να μην καεί από τις υψηλές θερμοκρασίες που θα αναπτυχθούν. Επίσης απαραίτητο είναι να βγάζουμε το μπολ από το φούρνο μικροκυμάτων με τη βοήθεια γαντιών ή πετσέτας κουζίνας.. Αλλιώς μπορείτε και καείτε άσχημα!!!

Το περίεργο με τη συνταγή αυτή είναι ότι γίνεται στο φούρνο μικροκυμάτων.. Και γι'αυτό τα γλυκάκια είναι έτοιμα τόσο γρήγορα..


Υλικά:


3 κούπες ξηροί καρποί

1 1/2 κούπες ζάχαρη λευκή

1 1/2 κούπες καστανή ζάχαρη

3/4 της κούπας κρέμα γάλακτος

1/3 της κούπας γάλα

1/3 της κούπας βούτυρο αλατισμένο. Ή απλό βούτυρο και προσθέτετε λίγο αλάτι.

1 κουταλάκι εκχύλισμα βανίλιας.

Εκτέλεση...

Βάζουμε τους ξηρους καρπούς σε ένα ταψάκι και τους καβουρδίζουμε στο φούρνο για 10-15 λεπτά στους 180 βαθμούς..

Όλα τα υπόλοιπα υλικά εκτός από τη βανίλια τα βάζουμε στο μπολ. Το μπόλ στο φούρνο μικροκυμάτων που τ βάζουμε στη μεγαλύτερη σκάλα και τα ψήνουμε για 5 λεπτά. Αφαιρούμε και ανακατεύουμε με ξύλινη κουτάλα. Τοποθετούμε ξανά και ψήνουμε για άλλα 5 λεπτά. Αφαιρούμε από το φούρνο, ανακατεύουμε και προσθέτουμε τους ξηρούς καρπούς. Στο φούρνο για μια τρίτη φορά πάλι για 5 λεπτά. Ελέγχουμε τη θερμοκρασία που πρέπει να είναι 115 βαθμούς. Αν δεν είναι ψήνουμε ακόμα λίγο μέχρι να φτάσει.. Σε μένα χρειάστηκε άλλες 2 φορές από 3 λεπτά...

Αφήνουμε να ξεκουραστεί για μισή ώρα. Προσθέτουμε τη βανίλια και ανακατεύουμε δυνατά... Μετά με δυο κουτάλια βάζουμε κομματάκια από το μείγμα πάνω σε ένα κομμάτι λαδόκολλα.. Βγαίνουν γύρω στα 40 κομμάτια.. 


Thursday, January 6, 2011

Cheese rolls

Memories...
Eating is all about memories. You eat something and it reminds you of what your mother once made and you loved it. When you eat it some years afterwards it still rings the same bells. Memories come flooding in and even if the dish is not really great or even passable, for you it is, as you feed with the memories and not the actual food. 


My mother used to make this cheese stuffed bread rolls for us. She would buy dough from the bakery and she would stuff it with cheese and a few herbs, fry it in some olive oil and serve it as lunch or side dish for some legumes for dinner. And it goes even before her as her mother would make it and would have my uncle go and sell them in a textile factory opposite our house back in the 50's when Greece was starting to bloom again after war and people needed staple and easy food. So for me this food always had a big spot in my heart and belly. 


I like to bake. The magic that some flour, water and yeast can do when combined it is a great trick and even though it is considered by most people to be really hard or time consuming it really isn't. What it takes is just a little planning. And in this day and age the planning needs to be the most important aspect more than time itself. 


Anyway... Since my mother is gone and i do not exactly remember what she used in the filling i tried to do it many times but it never worked. The reason was that i was using an egg to bind the cheese together but what it did was to make the filling runny and spill out during frying making a whole mess in the kitchen and really i did not like that... So... today i tried it without the egg and it came out just great! In the days that my mother was making it she was using xinotiri a cheese we used to get from the village my father was born. Today i used some feta cheese together with a touch of katiki...


Preparation...


For the dough
500g bread or strong flour 
340 g tepid water.
7g of dried yeast
a teaspoon of sugar to feed the yeast
a teaspoon of salt for taste


for the filling
150g of Feta cheese
50g of Katiki (or any other soft/creamy cheese
some pepper
some herbs fresh or dried crushed in the cheese mixture.


Makes about 12 rolls.. 


How you make it...
The planning comes to play. Dough needs about an hour and a half to rise. So.. you have to plan ahead depending when you want to serve it cause it is better when it comes out of the pan. 
If you want to make it for breakfast it is advisable to prepare the dough the previous night and let it stay in the fridge covered in a bowl. It will continue to rise but not so much and will be ready and mature the next morning. If you want it for a late night snack you can prepare it when you are back from work but think that is the last thing you want to do... Anyway...
Making the dough is easy. A few things to keep in mind. A dough is a living thing and as such you have to respect its needs. So.. what is dough and why it increases it's size.. Well, the yeast you use is actually little bugs that eat and eat and eat and excriment. What do they eat? well, the easy thing for them to eat in the beginning is the sugar that you add. Then they start eating the maltose from the flour.. And why the dough builds in size? well it is because the little buggers create carbon dioxide as a byproduct of their metabolism and that gas is what makes the dough expand. 
Now, as a living organism the yeast needs some optimal conditions to grow. And by that i mean the temperature and food. If the water used is too hot it will kill the bugs.. if too cold it will not help the bugs grow well.. so, best have the water at body temp... 
Take the tepid water, add the sugar and the yeast and let it bubble for a bit. In another container have the flour and the salt... Add the water/sugar/yeast mixture and start kneading..  Knead for 10 minutes, knocking, banging bashing the dough. Dough must come out looking elastic and shiny and ready.. 
Many people think that kneading is hard. Well, kneading 500g or flour is not hard and it takes little time and it is VERY theraputic. Also do not worry about how to knead. It is something that it is almost inherited in our DNA and pretty soon you will feel so natural about it. Just let yourself go... Get in a trans state almost and enjoy it all.. After the dough is ready and it may need a spoonful or two of extra four but not so much more, store it until it doubles it's size for 40 minutes or so. After that put it in the fridge and let it there all night. it will continue to grow more slowly. 
Next day remove the dough from the fridge for 30 minutes before frying. 
In a bowl mix the cheese and the herbs and cut little pieces of dough, flatten them in your hand and put some cheese in them. Close them and make sure the seal is tight... Then fry them in olive oil or any other cooking oil you use turning them over till they are golden brown in color.. put them on some kitchen paper to remove the exes oil and you are good to go... 


In Greek
Τυρόπιτες με ζυμάρι ψωμιού


Υλικά
Για τη ζύμη
500γρ αλεύρι κίτρινο για ψωμί

340γρ. νερό χλιαρό
7γρ. μαγιά ξερή
ένα κουταλάκι του γλυκού ζάχαρη
ένα κουταλάκι του γλυκού αλάτι

για τη γέμιση
150γρ φέτα σε κομματάκια 
50γρ κατίκι
πιπέρι
μερικά βότανα όπως δυόσμος ή ότι άλλο σας φωτίσει η έμπνευσή σας

Παρασκευή
Ανακατεύουμε το χλιαρό νερό με τη ζάχαρη και την μαγιά.
Σε μπολ βάζουμε το αλεύρι με το αλάτι
Ανακατεύουμε το αλεύρι με το υγρό μείγμα και ζυμώνουμε για 10 λεπτά. Αφήνουμε σκεπασμένο σε ζεστό μέρος να διπλασιαστεί ο όγκος του. Βάζουμε στο ψυγείο τη ζύμη αν είναι να τις φτιάξουμε την επόμενη μέρα ή αφήνουμε τη ζύμη να ξεκουραστεί και να φουσκώσει ακόμα περισσότερο. Παίρνουμε κομμάτια της ζύμης, τα ανοίγουμε στο χέρι μας και βάζουμε με ένα κουτάλι από τη γέμιση. Τηγανίζουμε σε καυτό λάδι μέχρι να χρυσίσουν...
Καλή επιτυχία!

Tuesday, November 16, 2010

It's time for MONKEYBREAD!!!!

Monkey bread…
A lot of water under the bridge and many many times i have made this dessert. Almost a signature thing for me a desert not to be eaten after a heavy dinner but something to be enjoyed during a brunch or breakfast or just with a hot cup of milk. 

A desert easy to make but takes it's time, a desert for slow food, for people that can wait… 

Patience is not a virtue i hold. I want things and want them now. This in cooking is a big mistake that have payed dearly on many occasions. Especially for something like a monkeybread. 

First came across this recipe from one of my favorite blogs (smittenkitchen). Debs in a small apartment in NYC creates wonders and share them with us. Love her writing, her persistence, incredible person!

There i read about monkeybread for the first time and she was raving about it. And when Debs is raving about something then you better try it soon! She is on to something for sure there.. 

So.. I tried it and was smitten… And not just me. All the people that tried it really got hooked and kept talking about it afterwards. Monkeybread brought people together and even gave a name to a weekend. After that first try i have made it atleast a dozen times and always with success. 

So, apart from the fact that it is a dish that you need to have patience for it inorder to turn out great you also have to keep in mind the timing cause it is at it's best when it comes out of the oven for people to enjoy the most.

Here is what you have to do:

Monkeybread with cream cheese glaze

Ingredients:
Dough
60 grams unsalted butter, divided (30g melted and 30g soft)
1 cup milk, warm
1/3 cup water
1/4 cup sugar
1 package yeast (dried or fresh)
3 1/4 cups all-purpose flour, plus extra for work surface
2 teaspoons salt
Brown Sugar Coating
1,2 cups packed light brown sugar.Have also tried it with dark and it is fine as well for me but i like the strong taste of dark sugar…
2 tablespoons ground cinnamon (we love cinnamon in our house)
150g unsalted butter , mleted
Cream Cheese Glaze
100g cream cheese, softened
4 tablespoons powdered sugar, plus extra if needed
4 tablespoons milk, plus extra if needed
1/4 teaspoon vanilla extract
OK! for the dough!
in the mixer with the paddle or hook mix the flour with salt. In a bowl mix the rest of the ingredients (only the 30g of melted butter though as the other 30 go for buttering the pan). 
Slowly incorporate the wet mixture in the mixer with the flour. Bear in mind a few things. When we say that milk and water have to be warm it means that we can stand the heat if we stick our fingers in. The yeast is a living thing and if the liquid is too hot it will kill the bugs that make it work. 
Another point to take into consideration when it comes to bread or this dough in particular is that as the mixer works, the dough gets less and less sticky. So you have to be patient and let it work for a long time till the dough becomes nice and silky.  If the worst comes to the worst and it is still wet after say 10 minutes in the mixer then add a bit of flour but no more than one or two spoonfuls.  
Let the dough rest in a warm place till it doubles in size (say an hour).
Prepare the coating. Melt the butter in a pan and mix the sugar and cinnamon in a bowl. 
Put the dough on a floured working surface and spread it out a bit inorder to cut it in 64 pieces (8X8). You can use a knife or scraper for that. It is advisable to separate the little pieces as if you let them there they tend to stick back in with the rest of the dough.
Have your pan ready. Dip pieces of dough in the butter and then dump them in the sugar bowl and roll them in sugar. Do not use a slotted spoon or spatula for that as too much butter sticks to them and apart from the mess you will make you will also spend a lot of butter. Transfer the little dough balls in the pan… When you are finished and the whole kitchen smells of melted butter, dark sugar and cinnamon put the pan in a nice warm place to rise for a second time… 
After that you can leave it in the fridge all night where it will rise a bit more and it will be ready for the oven the next day or pop it in the oven then and there for 30-35 minutes in 180 celcious… Let it cool for 5 minutes and not more before turning it upside down on a platter. Leaving it in the pan for more time will make the caramel that has formed to stiffen and bond with the pan and so you will not be able to remove it afterwards… 
Let it cool for 10 minutes while you prepare the glaze. Soften the cream cheese, add the sugar, milk, and vanilla. As each cream cheese is different do not mix all of the milk at once as it may become too runny. So… you are looking for a glaze that can cover the desert but not run away from the top of it… 
Enjoy!


Sunday, November 7, 2010

Baked Quinces with cream

Want to make a quick, easy and tasty desert with only 3 main ingredients and a few spices? A desert with no measurements and only one dish to wash up?


Take 2 quinces. Cut them in 8 slices. Core them and put them in a pan that goes in the oven. Add some cream to cover half of their height and some brown sugar. Spice the desert with a cinnamon stick, a couple of star anise, scrape the seeds of a vanilla bean, some orange peel. Feel free to omit any of the spices if you do not have them and in general try and see what combination works for you. 


Preheat the oven at 200C. Put the pan in the oven with a lid or some aluminum foil. Bake till the quince is nice and tender (30-45 minutes). Put slices of fruit in a bowl, scoop some of the cream and serve.. Serves 4…


If you want to go over the top sprinkle some dark sugar on the fruit that you have in the bowl and use a blow torch to make the sugar nice and caramelized. 
Bon appétit!


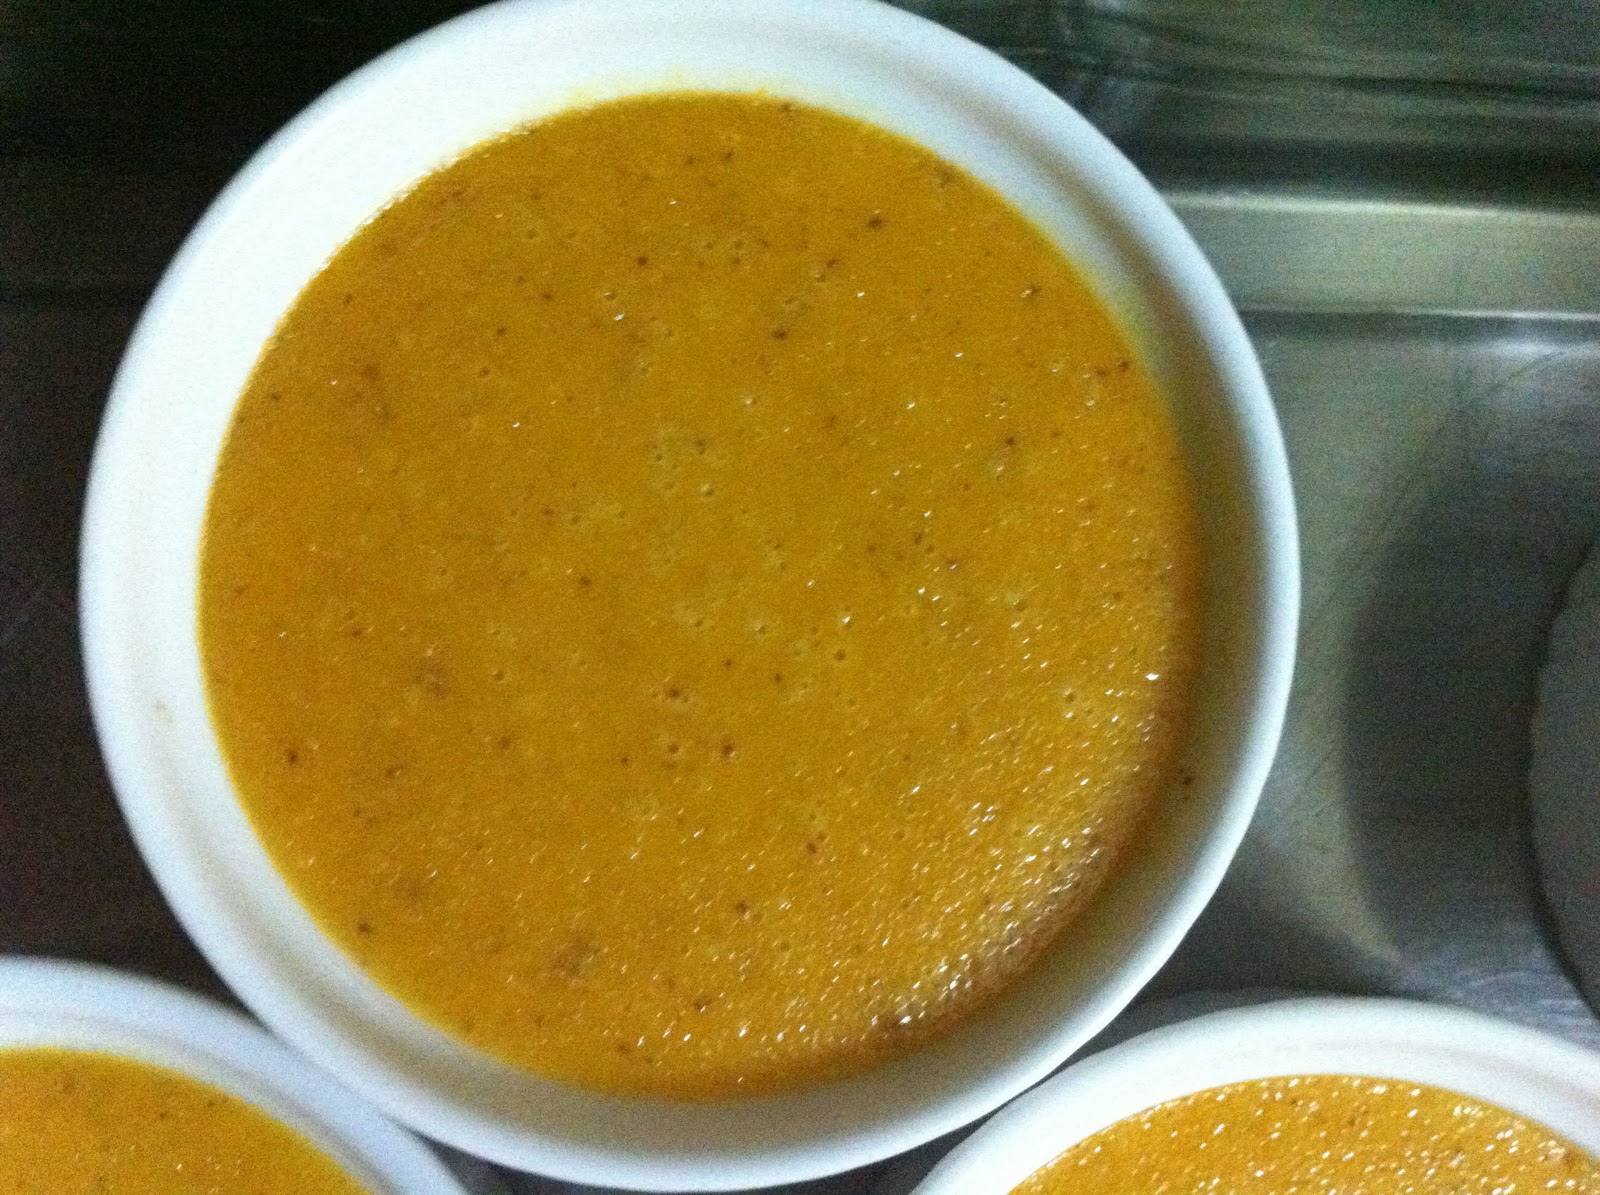
Pumpkin Crème brûlée

Sometimes you read a recipe and it just kicks you in the butt. Or just takes you from the shoulders and shakes you or shouts in your ear: "YOU HAVE TO MAKE ME"!! 
As if this recipe has a life and a mind of it's own, not to mention a will of it's own. 

This happened when i read a recipe for pumpkin creme brullee from Chef Eddy Van Damme. I had to make it and had to make it as soon as possible, possible tha same day.. Do not know what it was that really made this recipe for me to be so special. I mean i love pumpkin and it is pumpkin season and have blanced pieces in the freezer to make soups etc but the creme brulle is not my favorite desert. Too many eggs and cream and a cream custard is just a cream custard when it comes down to it. 


But the addition of the pumpkin and the pumpkin tuile take it all to a new level.. refined, airy and full of different textures and tastes… subtle, silky and yet with a distinct character that cannot go unnoticed.. 

So, let's get down to business…  but before i have to make a comment about the fact that the recipe asks for pumpkin puree. In USA it is easy to find canned puree and it has the right consistency and richness. Here in Greece we have to make our own. What i would suggest is take pumpkin, cut it in half, remove seeds and pulp and cover with aluminum foil. Bake in a preheated oven (170 C) for an hour or until tender. Scrape the "meat" and blend in a food processor. Now, in my case and since i had blanced pieces of pumpkin i put them in a pot and simmered in low heat till tender. Blended it and passed through a sieve. Since the puree was still runny i let it thick some more in a pot simmering in low heat for another 20 minutes… 

From now on i will be using the baked method for storing pumpkin in the freezer as it takes a lot less space and has a lot less water in it… 

The recipe of Cheff Eddy makes many many brulee but since i only use small 100ml ramekins i only made one third of the recipe.. With it i make 4 servings..

Ingredients:

3 egg yolks (60 gr)
70 g sugar
120g pumpkin puree
220g whipping cream
1,5g cinnamon
0,5g cardamon
0,5g ginger dried
1g salt
2g orange zest

Beat the eggs and sugar. Do not overbeat cause it makes a frothy layer on the brulee and it is not nice. Add the rest of the ingredients and stir. Put the mixture in the ramekins. Put the ramekins in a pan with high sides. Preheat the oven at 160C. Put the pan with the ramekins in the oven and add water in the pan to come up to 2/3 of the sides of the ramekin. Bake until the center is not wobbly. In my case it took 20-25 minutes. Cool and refrigerate. 30 minutes before serving take it out of the fridge and at the last minute you put some granulated sugar on top and caramelize it with a blow torch. 

Serve with a puking tuile… recipe for that follows

100g glucose
120g pumpkin puree
15g flour
150g powdered sugar
75g melted butter


Melt glucose in a saucepan but not boil. Add the puree and shift in the flour with the sugar. Finally incorporate the butter and add some spices like cinnamon, ginger etc. Spread the mixture as thin as possible on a baking sheet. Bake at 190C until edges start turning light brown. DO NOT overbake. Also it is a miracle watching the dough fluff up and then collapse and tiny holes start forming as sugar caramelizes… BEAUTY! Store in an airtight container but make only as many as you need. The rest of the batter can be frozen for later use… 

Saturday, October 30, 2010

APRICOT SOUFFLÉ WITH VANILLA RUM CRÈME ANGLAISE

Apricot soufflé and some creme anglaise to join it..

First let's talk a bit about magic… What is it that makes a souffle expand and makes the people who eat it go: Ahhhhh as it get's to the table? Look no further than the magic of air.. 

So what is a good souffle? well, a good one is in many ways a lesser one. Ofcourse taste and aroma are important but the structure and form and texture are even more important. And the presence of air trapped in the egg whites is even more valuable. So, in many ways, the best souffle is the one that has the most air in it or in other words the less souffle makes me most souffle :-) 


Been playing around with them in the past and apart from the obvious chocolate ones that you can find everywhere the rest are not as well known.. So… will talk about a favorite souffle that lately i have been baking again and again for us and guests. 

To get to the magic… A few things that need to be told before we start. Eggs are made up from the yolks and whites. Whites are all protein while yolks have some protein but a lot of fat too. Have to keep that in mind. Also when we make a souffle we make a meringue which is to beat the egg whites and by that trap air in the egg whites into tiny little bubbles. So the protein in the egg whites forms the bubbles, the structure for the souffle. Fat on the other hand keeps those bubbles break or not forming and air escaping from them so make sure that there is no trace of yolk in your whites when separating your eggs. 

Then the heat plays a great role. Heat actually does two things. First of all heat makes air expand and those millions and millions tiny bubbles of air take more space and that is what makes the souffle pop and double in size but also another thing that it does is to coagulate the egg white proteins (change their molecular shape in space) and make them sturdy and strong. There are other ways to coagulate proteins apart from heating. You can use and acid like lemon juice etc but that is for another recipy down the road. 

What this coagulation does though is to stiff the structure of the souffle and so when the heat is not there anymore, the souffle more or less keeps it's shape. Also another great thing about that is that you can have the souffle ready from a previous day, already baked and the day of the dinner just to pop it in the oven to heat up and expand making your guests wonder about your culinary skills. 

A few more things… Souffle because it can be done with some fruit juice, a bit of sugar and egg whites is a desert with few calories and high in protein. On the other hand my version here with the creme anglaise and all takes the fat and puts it back in the desert but oh well! Tastes a lot better, in my mind atlas.


APRICOT SOUFFLÉ WITH VANILLA RUM CRÈME ANGLAISE
Fills 12, 100 ml ramekins. 
180 gr dried apricots (about 1 ½ cups), quartered. Use the California ones you get in the silver bag unless you can get really good Kaisia.
1 ½ cups water
¾ cup sugar plus additional for coating ramekins
1 tablespoon fresh lemon juice
1 tablespoon dark rum if desired
½ teaspoon vanilla extract
5 large egg whites
Crème Anglaise:
1 cup cream
1 cup milk
half a teaspoon of vanilla extract 5 large egg yolks
1/4 cup sugar
1 tablespoon dark rum, or to taste

In a saucepan simmer the apricots, sugar (1/2 cup) and water. Keep the pan with the lid on. Do that for 20 minutes or until apricots are soft. Transfer the mixture (keeping some juice on the side) in a food processor and process until it is a smooth puree. Add some or all of the reserved juice if the puree seems too thick. Get a chinois or a tapis or a sieve and pass the puree from there to become more velvety and smooth. (structure is the essence we said). To the strained puree add the lemon juice, vanilla, rum and a little bit of salt to exalt the aromas. Let it cool into room temperature and you can keep in the fridge for a few days. At the day of use let it out of the fridge till it gets warm again. 

Butter the 12 ramekins and sprinkle with sugar to coat. Turn the oven on at 180 celcious.  

In a very CLEAN bowl (important as if it has traces of fat or oil it will ruin the meringue) beat the egg whites with a pinch of salt. Salt helps with coagulation. Also the point of the meringue is to have millions and millions of tiny air bubbles and not less but bigger ones. We have said that  the structure is important and a better structure is easier to maintain if the protein bubbles are more and smaller than if they are less and bigger. The way to do that is to beat the whites slowly and steadily and not just zap them in the mixer at top speed.

Meringue is ready when it forms soft peaks and has lost it's shine. Do not overbeat it and let it form firm peaks as this may result in problems when incorporating the puree. Slowly mix the remaining 1/4 cups  sugar in that mixture. Add about a third of the meringue in the puree mixture and slowly incorporate it. The amount of bubbles is important so take care not to beat in the whites but rather massage them slowly in the puree. Then add the remaining two thirds of egg whites one third at a time… make sure that the mixture is all one and devide it in the ramekins. 

You have two choices here. One is to do this some hours before the dinner and let the uncooked mixture stay in the ramekins in room temperature and it will be just fine or bake it then and there and let it coo, store it in the fridge for up to 4 days and just before dinner reheat it in order to serve it just when your guests have finished the main course.. 

Now.. If you want to take it all a step further then make the creme Anglaise. 
That cream is quite important as it is the base for many things. From sauces to icecreams so it is good to know how it is made. What it is, is a mixture of eff yolks, sugar and cream or cream and milk.  Egg yolks as we've said contain some protein and a lot of fat. Also there is far in the cream so cream Anglaise is by no means something to be eaten while you are on a diet. On the other hand a little taste never hurt anybody so here we go…

In a saucepan heat the milk and cream till it boils. Remove from heat. 
In a bowl beat the eggs with sugar till it is nice and frothy… Very slowly start adding the cream in the egg mixture. VERY SLOWLY. That will allow the eggs and cream to mix without the eggs being cooked from the high temperature of the cream but will slowly rise the temperature of the egg mixture. When one third of the cream is in the eggs empty all that back in the saucepan and put it back on the fire.. Stir constantly with a wooden spoon till the cream thickens and covers the back of the spoon. DO NOT let it boil otherwise you will get an omelet and not a creme… 

When it is ready pass it through a sieve, add the vanilla extract and the rum.. Let it cool and put it in the fridge to cool. Add a few spoonfuls of the cold creme to the hot souffle as it comes out f the oven…